WSO2 ESB supports securing unsecured web services. In this post I'm going to explain how you can secure a web service with WSO2 ESB, using it as an integration layer.
You may have heard of proxy services. A proxy service is a virtual service hosted within an ESB. Simply a proxy service wraps a back-end web service hosted in an application server. A proxy service receives messages that have been sent to a specific endpoint (back-end service) defined in the proxy service configuration. Before forwarding the messages to the relevant endpoint the proxy service can process them if needed, using mediators.
These back-end services may no be secured always. In such a case those unsecured services can be made secured by using the ESB as integration layer. To do that what we need to do is creating a secure proxy service with WS-Security enabled with a specified security policy.
Here are the simple steps to follow to secure a web service.
Open the ESB Management Console.
Create a Proxy Service by clicking on the Services -> Add -> Proxy Service ->Pass Through Proxy in the Main tab. (Here I've selected Pass Through Proxy since I just need to forward messages to the endpoint without performing any processing on them)
Give a name for the Proxy Service and specify the target endpoint. Here I've given the web service URL which is hosted within the Axis2 server.
Then you will be redirected to the List of Services.
You will see the proxy service is shown as 'Unsecured'. Click on 'Unsecured'.
You will be prompted to Enable Security. Select Yes. Then select the UsernameToken as the Basic Scenario.
Click Next. Select user group and Finish.
Now the proxy service is security enabled. You can see the endpoint starting with https:// service dashboard of the proxy service.
Now let's see how to access this web service using a secure client.
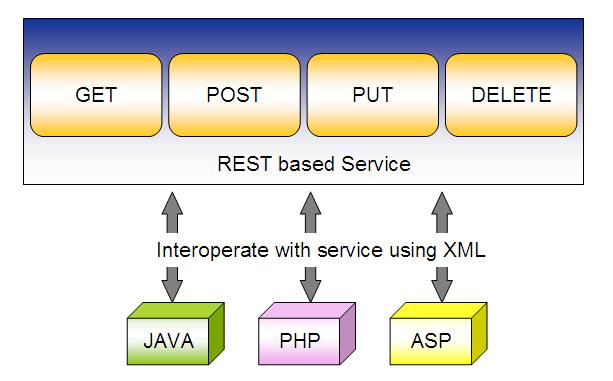
REST is an architectural style that used to write a web
service in a certain way. It is based on web-standards and the HTTP protocol. This style was defined by Roy
Fielding in 2000.
In REST architecture the main concept is the Resource which can be uniquely identified by an Uniform Resource Identifier or URI. Every resource supports the HTTP operations.
In this post I'm going to describe how to implement a RESTfull web service which I am going to create as a standalone service with an embedded Jetty server. So you do not need to deploy it in a web container.
This is a simple web service to store and retrieve music track details.
Here is the pom.xml file which contains the relevant dependencies. You can see how the embedded Jetty server is configured through the maven-jetty-plugin and the port being set to 9090.
This web service accepts requests in JSON format and responds with the same format.
Here is the data model Track.java
package com.wso2.training.manorama.model;

/**
 * Created with IntelliJ IDEA.
 * User: manorama
 * Date: 12/4/14
 * Time: 10:24 PM
 * To change this template use File | Settings | File Templates.
 */
public class Track {

    String title;
    String singer;

    public String getTitle() {
        return title;
    }

    public void setTitle(String title) {
        this.title = title;
    }

    public String getSinger() {
        return singer;
    }

    public void setSinger(String singer) {
        this.singer = singer;
    }

    @Override
    public String toString() {
        return "Track [title=" + title + ", singer=" + singer + "]";
    }

}
Now I will describe you how to implement the RESTfull web service for this. Here is the web service implementation class.
package com.wso2.training.manorama;

import com.wso2.training.manorama.model.Track;

import javax.ws.rs.*;
import javax.ws.rs.core.MediaType;
import javax.ws.rs.core.Response;

/**
 * Created with IntelliJ IDEA.
 * User: manorama
 * Date: 12/4/14
 * Time: 10:23 PM
 * To change this template use File | Settings | File Templates.
 */
@Path("/musicservice")
public class JSONService {

    @GET
    @Path("/randomtracks")
    @Produces(MediaType.APPLICATION_JSON)
    public Track getTrackInJSON() {

        // Here you can modify this code to get a random track from the available music tracks

        Track track = new Track();
        track.setTitle("Enter Sandman");
        track.setSinger("Metallica");

        return track;
    }

    @POST
    @Path("/tracks")
    @Consumes(MediaType.APPLICATION_JSON)
    public Response createTrackInJSON(Track track) {

        String result = "Track saved : " + track;
        return Response.status(201).entity(result).build();
    }
}
To map the incoming requests, we configure the web.xml (webapp/WEB-INF/web.xml)
When looking at the web service implementation java code, you can see the GET requests with the pattern /randomtracks come to the getTrackInJSON() method. It will respond with a Track object in json format. Note the @Produces(MediaType.APPLICATION_JSON) annotation.
The POST requests comes with the pattern /tracks will create a new Track object and responds with the HTTP 201 OK.The Track object should be in the json format. Note the @Consumes(MediaType.APPLICATION_JSON) annotation
com.sun.jersey.api.json.POJOMappingFeaturetrue
This will map the POJO class to json. Thus the posted json string will be converted into “Track” object automatically.
To deploy this you will need several libraries to be included in the webapp/WEB-INF/lib folder
asm-3.1.jar
jersey-client-1.18.jar
jersey-core-1.18.jar
jersey-json-1.18.jar
jersey-server-1.18.jar
jersey-servlet-1.18.jar
jsr311-api-1.1.1.jar
Since this is a standalone service you do not need to deploy it in a web container. Simply run, $ mvn jetty:run
In this post I'm going to explain how to implement a client application for the Axis2 web service we created in my previous post.
We can use the WSDL2Java tool in Axis2 to generate the client side stubs to interact with the service. You can use either the command line version of this tool or the Ant task as mentioned in the Axis2 guide [1].
In this post I will use the axis2-wsdl2code-maven-plugin to generate the client side stub.
You can use this pom to configure the axis2-wsdl2code-maven-plugin to genrate the stub code and the project structure.
Create a directory with the name SampleClient (with any name you prefer).
Save the above pom.xml with the required configuration.
Note the <wsdlFile> element contains the path to the WSDL file. In this case it is the WSDL file of the OrderProcessingService deployed in the Axis2 Server. So the Axis2Server should be up and running. <packageName> element contains the package name which contains the generated stub java code.
And configure the groupId, output directory as you prefer.
To generate the client stubs and the project structure go inside the folder SampleClient and give the following command. $mvn clean install
You will be able to see the generated folders src and target. Now you can open this maven project using your preferred IDE. Here I'm using IntellijIdea.
You will see the project structure similar to the image below.
Now it's time to write the client code to send request.
I've created another package called orderclient. Inside that I've added a new Java class Client.java
package org.wso2.training.orderclient;

import org.apache.axis2.AxisFault;
import org.wso2.training.orderprocessor.stub.OrderProcessingServiceStub;

import java.rmi.RemoteException;
import java.util.logging.Level;
import java.util.logging.Logger;

/**
 * Created with IntelliJ IDEA.
 * User: manorama
 * Date: 11/28/14
 * Time: 1:14 PM
 * To change this template use File | Settings | File Templates.
 */
public class Client {

    private static final Logger logger = Logger.getLogger(Client.class.getName());

    public static void main(String[] args) {

        OrderProcessingServiceStub stub = null;
        try {
            stub = new OrderProcessingServiceStub();

            // Create the request - In-only
            OrderProcessingServiceStub.SubmitOrder request = new OrderProcessingServiceStub.SubmitOrder();
            request.setOrderID("25");
            request.setAmount(240);
            stub.submitOrder(request);

            // Invoke the service - In-out service
            OrderProcessingServiceStub.GetAmount getAmount = new OrderProcessingServiceStub.GetAmount();
            getAmount.setOrderID("25");
            OrderProcessingServiceStub.GetAmountResponse response = stub.getAmount(getAmount);

            logger.info("Response from OrderProcessing service [OrderID : 25]: " + response.get_return());

        } catch (AxisFault axisFault) {
            logger.log(Level.SEVERE, axisFault.getMessage());
        } catch (RemoteException e) {
            logger.log(Level.SEVERE, e.getMessage());
        }


    }
}
In this post I'm going to explain a simple way to implement an Axis2 Web Service and how to deploy it.
This is a simple Order Processing service. I will start with a simple Java class and show you how to make a web service from it by including necessary configuration and packaging.
Next add a Java class to your project with the name of the web service. This Java class contains all the methods which will be exposed as the operations of the web service.
import java.util.HashMap;

/**
 * Created with IntelliJ IDEA.
 * User: manorama
 * Date: 11/27/14
 * Time: 2:22 PM
 * To change this template use File | Settings | File Templates.
 */
public class OrderProcessingService {

    private HashMap ordersMap = new HashMap();

    public double getAmount(String orderID) {

        Double price = (Double) ordersMap.get(orderID);
        if(price != null){
            return price.doubleValue();
        }
        return 0.00;
    }

    public void submitOrder(String orderID, double amount) {

        ordersMap.put(orderID, amount);
    }
}
Next we have to add a service descriptor to the project. This is an xml file with the name services.xml. Each Axis2 service must have a service descriptor. The service descriptor informs Axis2 about the service.
Create a folder META-INF inside resources folder. And create an xml file services.xml inside that folder.
For the Order Processing Service, the service descriptor is as follows.
        Order Processing Service


        OrderProcessingService
We write the details about a web service inside the <service > element.
We define message receivers that need to be used for the web service operations inside < messageReceivers > element. < parameter > element contains the name of the service implementation class.
Now we're done with the coding. Next step is to package the service implementation and configuration files according to the Axis2 format.
First compile the above code. It will create the directory target which contains the compiled class files inside the classes folder in it. Then simply change the directory to target/classes.
$cd target/classes
You can see the .class files and the META-INF directory containing the services.xml.
Now run the following command to package all the files into an aar archive with the relevant service name. In this example it is OrderProcessingService.aar
$jar -cvf OrderProcessingService.aar *
To deploy the web service, copy the generated OrderProcessingService.aar into $AXIS2_HOME/repository/services
You can see the deployed service once you start the Axis2 server and point the browser to http://localhost:8080/axis2/services.
We know .bashrc file inside our Ubuntu home folder is the file in which we set the environment variables for a single user. This is the bash script file.
Linux determines the executable search path with the $PATH environment variable
For example, after installing JDK we set $JAVA_HOME variable and update the $PATH variable.
To set those variables, we add the following lines at the end of the .bashrc file.
So, what is the actual use of export even after appending the relevant path to the $PATH environment variable? Why do we need to export even after appending it to the $PATH variable?
The reason is,
Appending only to the $PATH is not sufficient because, it is same as setting a value inside a script (Here, only in .bashrc script). Thus that change is effective only within the
script. In Ubuntu, it will be effective only within bash.
To make this change effective to any program called by bash we need to exportthe environment variable.
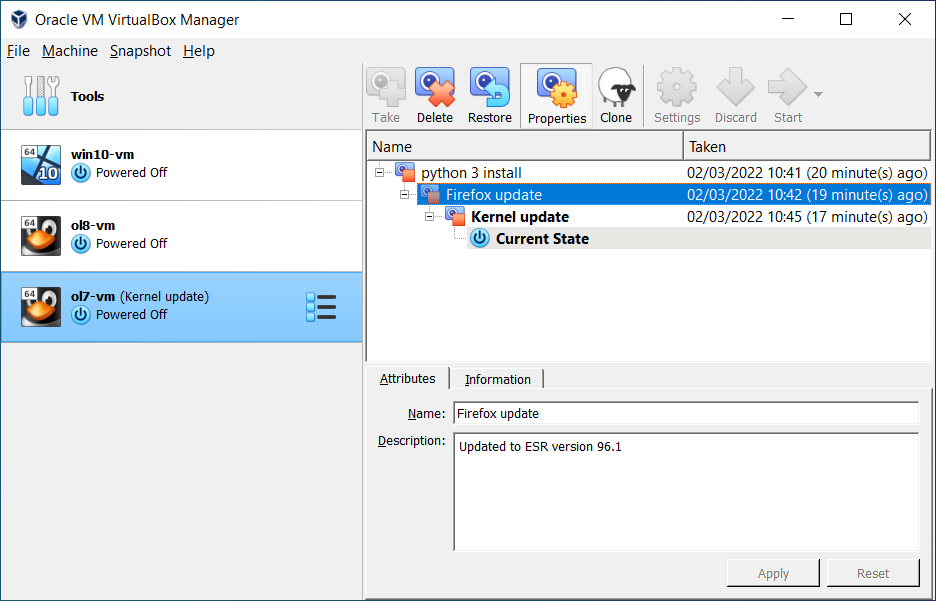
Oracle VirtualBox is a cross platform application that allows you to install one operating system on top of another. "Snapshots" is a cool feature offered with VirtualBox.
With this feature we can save a particular state of a virtual
machine and revert back to that state, if necessary. This is really helpful when experimenting. If something goes
wrong we can easily switch back to a previous snapshot
and avoid the need of frequent backups and restores. After reverting, the virtual machine will
be exactly how it was before. It is similar to reverting back to a particular revision in a version control systems we are using when doing coding stuff.
We can create any number of snapshots, and they allow us to travel
back and forth in virtual machine time. Snapshots can be deleted
while a VM is running, to reclaim disk space.
Remember these as well;
Once you ask VirtualBox to take a snapshot the virtual machine will be dim out periodically while a point in time snapshot is taken.
To revert back to a particular snapshot you have to shut down the VM first.
This is something I got to know recently while trying to install a new software package on Ubuntu.
In Ubuntu, we use apt-get command line tool very often. It is, Ubuntu's Advanced Packaging Tool (apt)
which performs functions such as installation of new software packages,
upgrade of existing software packages, updating of the package list
index, and even upgrading the entire Ubuntu system.
sources.list file located in /etc/apt folder, is the default file which contains the details about the repositories needed when installing or upgrading the applications. When the system needs to know from where it may download the related stuff to install/upgrade it basically goes through this file.
Repositories are servers which contain sets of packages. Ubuntu uses apt for package management. apt stores a list of repositories or software channels in this file.
We can add a new repositories by simply adding a new line to this file. You can learn about the format of the entries in this file here.
Once the editing stuff done, we have to do one more thing. Just to make apt aware of the changes done to sources.list, run;